
Documentation
Application Workflow
Application Workflow
Each application will have a 'Status' to indicate its progress through your workflow. The default workflow goes like:
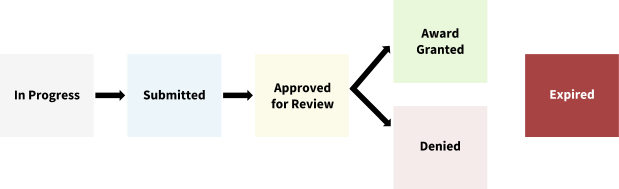
The application begins with status of 'In Progress.' In this status, the applicant can edit the application and does not need to fill in all required fields yet.
Once the applicant submits their application, and the application is valid (all required fields filled in), its status changes to 'Submitted.' If the cycle is still open, the applicant can still edit the application in that status, but doing so sets it back to 'In Progress.' When the application changes to 'Submitted' the PDF version of the application is generated, allowing the applicant (and reviewers/staff) to download a copy of their application.
If the application is still in 'In Progress' when the cycle ends, the application automatically becomes 'Expired.'
When the cycle ends, a staff person should manage the applications by going to 'Manage Application Cycles' -> 'Applications' (for the cycle) -> 'Bulk Editing'. Here she can manually set applications to the **'Approved for Review' **status. (She can alternatively change statuses by editing an application.) While in 'Approved for Review' reviewers assigned to the cycle will be able to review the applications.
Finally a staff person should assign each 'Approved for Review' application to either 'Award Granted' or 'Denied' status via the Bulk Editing page or by editing each application. If you set the Cycle to 'List on Past Awards Page' then applications in status of 'Award Granted' will be listed in the Past Awards section.
Customizing the Application Workflow
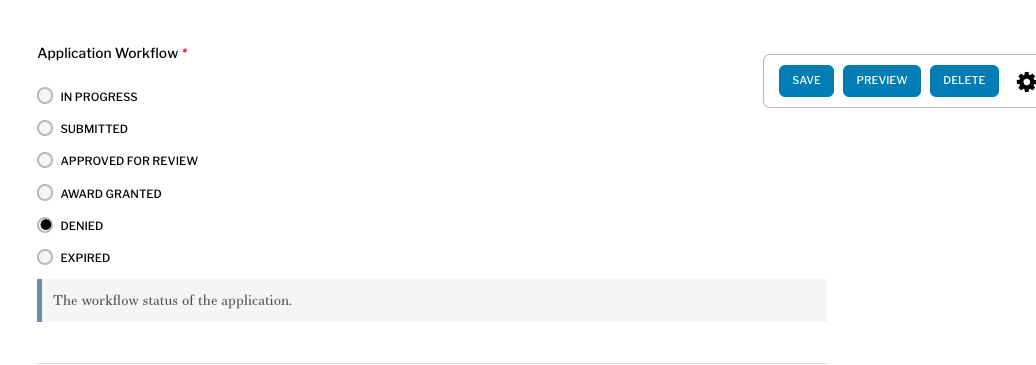
Editors can customize the workflow states that applications pass through. You may want to customize the names of the states or add additional states.
Navigate to Application Management -> Application Workflow. Here you will find a list of existing statuses arranged in the general order through which applications will move through. To add a new status click ‘Add Term’ at the top of the page. Fill out the ‘Name’ field and any other relevant fields then ‘Save’. Navigate back to the 'Application Workflow' overview page. Here you can adjust the order of the items to include your new status.
Note: Application Workflow statuses apply to all application types so change with caution.
The following statuses cannot be deleted: In Progress, Submitted, Approved for Review, Award Granted, Expired. These statuses have automated behavior associated with them.
Configuring Application Workflow Emails
Applicants can automatically be sent emails when their application is moved to a new status. You can use this to alert applicants to a change in status.
To activate messages sent to users at different workflow states and customize what they say, go to Application Management -> Application Workflow. Click ‘Edit’ on the status for which you would like to enable a status change email notification. On the form that follows you will need check the 'Send E-mail' box and fill out the ‘E-mail Subject’, ‘E-mail Message’ fields with the email text to be sent to applicants.
You can include dynamic tokens in the email subject and message. Click 'Browse Available Tokens' to see the options. For example, you could include a link to the application with [application:original:url:absolute] or include the award amount with [application:field_award_amount].