
Documentation
Getting Started
Getting Started
You can quickly get your own ApplyCycle site by filling out the Contact form at https://applycycle.com/contact/. You can use this site as a disposable demo site, or, if you are happy with the changes you make to it, we can keep them when you’re ready for a live site at your custom domain.
This documentation assumes you have logged in to an ApplyCycle site with a user account with a role of 'Editor.'
Edit Your Programs
Go to the ‘Programs’ page in your main menu and you will see three demo programs. They are also shown on the homepage. How many different application programs does your site need? You may need only one, or you may have several programs with different application forms. Click on a program and then click its ‘Edit’ tab to change the program description. You can also delete programs.
Create an Application Cycle
Many organizations offer the same program every year, or on some other schedule. Each ‘round’ that you offer your program is called a Cycle. Add a new Cycle that starts in the past and closes in the future- this way your cycle will be currently accepting applications for testing.
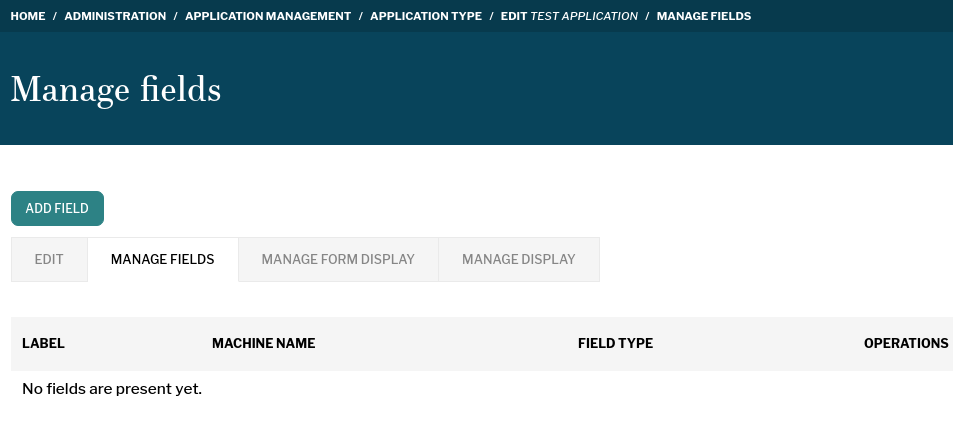
Add a Field to Your Application
Find your application form by going to 'Create an Application' in the 'Application Management' menu. By default you'll only see fields in an 'Admin only' section (applicants will not be able to see these fields.) Let's add our first applicant field. We'll make it a text field with a WYSIWYG.
Go to 'Manage Application Types' in 'Application Management' and choose your application type. Go to the 'Manage Fields' tab and press 'Add Field.'
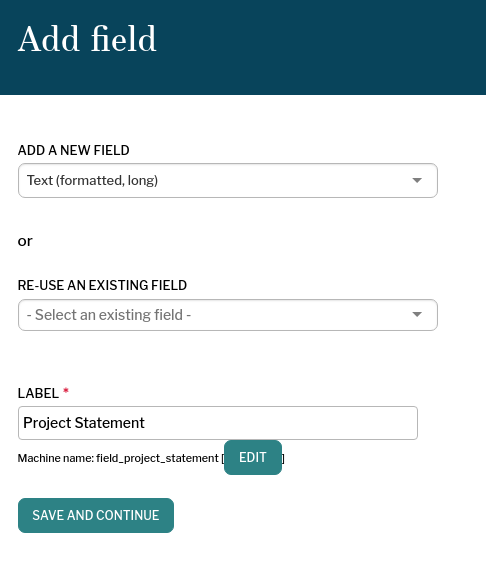
Choose 'Text (formatted, long)' for the field type and set the label for your field. Press 'Save and Continue.'
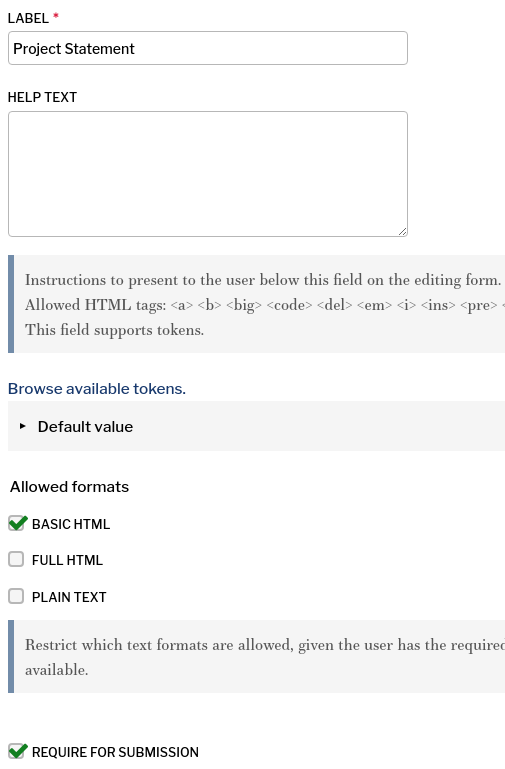
Press 'Save Field Settings' on the following field settings page.
Add help text for your field and set it to be required for submission on the next page.
Learn more about Adding Fields.
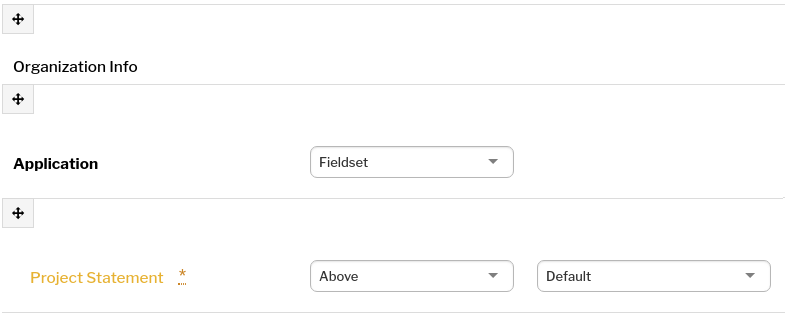
Next, go to the 'Manage Form Display' tab. Use the crosshairs to drag your new field into the 'General' field group. It should be slightly indented to show that it is inside the 'General' section. Save the 'Manage Form Display' page.
Learn more about Managing Form Displays.

On the 'Manage Display' tab, drag your new field below and slightly to the right into the 'Application' field group, so that it is slightly indented. Save the 'Manage Display' page.
Learn more about Managing Application Displays.
Now let's try out your new field. Go to 'Create an Application' in the 'Application Management' menu. Fill out your new field and press 'Preview' to view the application.